| Pages:
1
2 |
smaerd
International Hazard

Posts: 1262
Registered: 23-1-2010
Member Is Offline
Mood: hmm...
|
|
Power Supply from ATX, DIY
Well there's a few tutorials and such available on-line on how to turn an ATX power supply into a laboratory power supply. I don't know if this thread
is meant to be 'blog' like or not, because I'm more than likely going to need help/advice along the way.
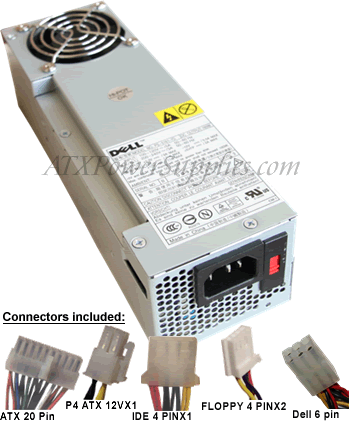
So I went on craigs-list and found an old dell power supply: http://www.atxpowersupplies.com/160-watt-dell-power-supply-p...
It' says it's ATX and lists it's out-put's. I know nothing about electronics so this will be an interesting adventure. First things first I'm going
to try and find a wiring schematic to figure out what wires are what voltage.
If anyone's done this some advice would be helpful, no your not responsible if I zap myself to death, I am  . .
* Update * Borrowed from - http://www.ehow.com/how_2251617_add-variable-voltage-atx-bas...
| Quote: | | "Orange Orange +3.3V," "7 Black Black GND," "10 Yellow Yellow +12V" (you might want to solder two wires to the pin), "Blue Solid Grey -12V," "Black
Black GND," "Green Green Switch on," "18 White Grey/Red -5V" and "Red Red +5V. |
[Edited on 26-2-2011 by smaerd]
|
|
|
condennnsa
Hazard to Others
Posts: 217
Registered: 20-4-2010
Location: Romania
Member Is Offline
Mood: No Mood
|
|
Why would you buy that power supply? It's got poor maximum currents.
Most cheap chinese PSUs can deliver 30 amps on the 5 volt rail, and most of them are surprisingly good quality.
|
|
|
smaerd
International Hazard
Posts: 1262
Registered: 23-1-2010
Member Is Offline
Mood: hmm...
|
|
I got it for free off of craigslist. It won't work for general electro-chemistry experiments?
|
|
|
condennnsa
Hazard to Others
Posts: 217
Registered: 20-4-2010
Location: Romania
Member Is Offline
Mood: No Mood
|
|
Of course it will work well. And if it's free even better.
|
|
|
smaerd
International Hazard
Posts: 1262
Registered: 23-1-2010
Member Is Offline
Mood: hmm...
|
|
Thats what I was thinking :]. If I had the cash I'd out-right buy a used one, but alas I'm broke and it couldn't hurt to learn a little more about
basic electronics.
This .PDF explains everything:
http://www.google.com/url?sa=t&source=web&cd=6&v...
|
|
|
Chordate
Hazard to Others
Posts: 108
Registered: 23-2-2011
Member Is Offline
Mood: No Mood
|
|
You don't have to worry about wiring schematics because each of those connectors/wiring colors is standardized.
The four pin IDE is Yellow: +12V, Red +5V, and the two blacks are grounds.
20 pin ATX is the same. All the blacks are grounds, all the yellows are +12V, The Reds +5V, and the oranges are +3.3V.
Edit: oh, and blue is -12V, white is -5V
[Edited on 27-2-2011 by Chordate]
[Edited on 27-2-2011 by Chordate]
|
|
|
Regolith
Hazard to Self
Posts: 73
Registered: 4-2-2011
Location: Mining the moon.
Member Is Offline
Mood: Glacial
|
|
On the ATX connector there will be a green wire. That shorted to any of the grounds will turn the unit on. Pop the thing open and see if all the rails
are one. Sometimes even the cheap power supplies have more than one independent 12V rail inside. Note some supplies need a parasitic or ghost drain in
addition to the power on wire to start. Connect an old drive or 12 volt device to the unit if it doesn't start with just jumpering.
Upon closer inspection it has an independent line for processor power. It will likely have more than one rail. It was almost standardized to keep
drives powering up from lowering the voltage going to the processor.
Open it up and take a picture of the pcb where the wires connect. I can guide you very well in all things computer 
|
|
|
woelen
Super Administrator
Posts: 7976
Registered: 20-8-2005
Location: Netherlands
Member Is Offline
Mood: interested
|
|
I have written a page on making a good electrolysis power supply:
http://woelen.homescience.net/science/chem/misc/psu.html
You can take the 5V directly for chlorate-production. If you want more general electrolysis experiments, then also keep the 12V and combine this with
resistors as written in the page.
|
|
|
smaerd
International Hazard
Posts: 1262
Registered: 23-1-2010
Member Is Offline
Mood: hmm...
|
|
@woelen - Wow woelen you rock, thanks for the link and taking the time to do that. I'm going to keep the 12V even though I'm not sure exactly what
kind of experiments I'll be using it for. I just found this neat e-book called "Handbook of Electrochemistry", and it really seems like a useful
mind-set/skill to be in as a home scientist.
A lot of interesting reactions can be done with little to no reagents(saves cost), and it seems like there are a lot of experiments and things to
still be found out in the field.
@Regolith, the PCB is pretty hard to see, there's all kinds of epoxy(?) and such covering connections. And for some reason my camera isn't recognizing
this SD card  . Sounds like another project to work on for today hehe. . Sounds like another project to work on for today hehe.
Anyhow,
I'm picking up some binding posts tomorrow, a little LED /w resistor, and hopefully some resisters(depending on cost only have $5 to my name hahaha).
I'll update this as things progress along surely with questions, ideally with instant success.
|
|
|
Regolith
Hazard to Self
Posts: 73
Registered: 4-2-2011
Location: Mining the moon.
Member Is Offline
Mood: Glacial
|
|
Nice Woelen! thats hardcore it's almost like you have threads here with entires about chlorate cells. How crazy would that be ? Just a side note from my own work with computers. If your duplicating these results
you actually don't want the craziest highend supply you can get.
I've seen far more regulation circuitry of late in the higher end 3 and 4 (12 volt) rail supplies that didn't allow me to use it for electrolysis. I
was attempting a torch based on oxyhydrogen (got it working eventually with a rewound MOT, inelegant but functional) and the circuit would cut out
after several minutes of water cracking. I needed to bypass several built in regulators that while it wasn't overheating, was assuming the system was
in malfunction. Also the 12 volt rails (in this model) weren't capable of stacking amperage due to the way the transformer had been tapped inside(and
instantly shutdown if cross leakage was detected). I haven't yet gotten around to rewiring the transformer, which is doable but unnessessary work.
Stick to the cheaper models with less bells and whistles for these and use Woelens guide (I seriously repect those who make guides
like that for the uninformed) for the wiring.
|
|
|
aonomus
Hazard to Others
Posts: 361
Registered: 18-10-2009
Location: Toronto, Canada
Member Is Offline
Mood: Refluxing
|
|
The one major problem I have found with the ATX style power supply is the fairly sensitive over current protection. Essentially any dI/dt value too
high will trip the OCP shutting the power supply down. That means you have to star the power supply with the full current load attached, which is bad
for any circumstance of soft-start (unless you have massive smoothing caps attached to the supply).
|
|
|
Sedit
International Hazard
Posts: 1939
Registered: 23-11-2008
Member Is Offline
Mood: Manic Expressive
|
|
Careful, standard wiring drove me nuts in the past, look for the other thread on this topic to see what im talking about. Its not always what it
appears. A little work with it however can solve that problem but I had wires that just did not match the code so if you have issues keep this in
mind.
Knowledge is useless to useless people...
"I see a lot of patterns in our behavior as a nation that parallel a lot of other historical processes. The fall of Rome, the fall of Germany — the
fall of the ruling country, the people who think they can do whatever they want without anybody else's consent. I've seen this story
before."~Maynard James Keenan
|
|
|
woelen
Super Administrator
Posts: 7976
Registered: 20-8-2005
Location: Netherlands
Member Is Offline
Mood: interested
|
|
That's why a certain load must be present in the power supply. In my write-up I describe how a resistor is added as a load. This load has proven to be
sufficient for me in at least 3 different power supplies. It starts up without problem and I can connect a cell, drawing multiple amperes to the power
supply while it is switched on. Apparently it is not dI/dt which matters, but the ratio of the final current and the current where it comes from.
I agree with the remark that one should use a simple dumb power supply without frills. These are the cheap simple small boxes you find in almost every
cheaper PC. The branded things (like DELL, ACER, et.c.) usually have special-made 'intelligent' power supplies and sometimes also special-made
mainboards. Avoid these for electrolysis experiments, use the plain/dumb ones.
[Edited on 28-2-11 by woelen]
|
|
|
peach
Bon Vivant
Posts: 1428
Registered: 14-11-2008
Member Is Offline
Mood: No Mood
|
|
That mention of the cross leakage and it shutting down was interesting Regolith.
I've been trying to power up some 12V circuits recently that could really do with tens of easily adjustable amps. I have three power supplies already,
but the load lines of them keep getting in the way as the load gets even half way towards the supply's maximum wattage. I've seen countless pages
about using them as is, or sticking a linear regulator on the output, but I was curious to know how close one of these could get to approximating one
of those multithousand pound rack mounts people like Lambda sell. Someone has already done most of the hard work in getting the dirty AC into DC,
roughly stabilising it, adding some protection, filters and so on.
I began reading around and discovered, in the wiki titled power supply (computers), some useful information.
Multiple 12V power supply rails are separately current limited as a safety feature; they are not generated separately. Despite
widespread belief to the contrary, this separation has no effect on mutual interference between supply rails;
The ATX12V 2.x and EPS12V power supply standards defer to the IEC 60950 standard, which requires that no more than 240 volt-amps be present
between any two accessible points. Thus, each wire must be current-limited to no more than 20 A; typical supplies guarantee 18 A without triggering
the current limit. Power supplies capable of delivering more than 18 A at 12 V connect wires in groups to two or more current sensors which will shut
down the supply if excess current flows. Unlike a fuse or circuit breaker, these limits reset as soon as the overload is removed.
Because of the above standards, almost all high-power supplies claim to implement separate rails, however this claim is often false; many omit
the necessary current-limit circuitry,[5] both for cost reasons and because it is an irritation to customers.[1] (The lack is sometimes advertised as
a feature under names like "rail fusion" or "current sharing".)
One simple solution to regulation is to fight back, with a jumper! Important
to remember that rebellion usually involves a building on fire.
But this is all just groundwork for my far more epic scheming.
Having a look inside, I discovered two IC's. One a voltage comparator and the other a PWM switch mode controller; as one might expect in a SMPS.
I began chatting with some nerds from the darkside of electronics about the possibility of hacking the switch mode section it's self, as opposed to
sticking big resistive dividers or linear regulators (yeah.... resistive dividers  ) on the output and needing huge heatsinks. ) on the output and needing huge heatsinks.
Hey presto! Someone has been daring enough to start fiddling with the feedback for the controller.
By playing with the voltage the feedback pin is getting, you can not only adjust the rail voltage from 12 down, you can run it up to about 50V, just
before the output caps explode and blow hot goo towards you.
That's exciting! Because it conserves the space and weight saving potential of the SMPS, but provides you with an adjustable rail voltage.
One initial problem is, the controller will think the rails have gone over their limits, and trigger the shutdown. Solution? You know it. Play with /
disable the over voltage on the rails.
This is starting to show some really cool potential. You now have the rails adjustable for a constant volage, and (provided you don't entirely disable
it, but alter it instead), the O.V.L. that the rack mount supplies for labs feature.
These newer models have the current limit as well. So I expect that could also be butchered into being adjustable, or even toggled back to the
controller to make it a constant current source? Or, if you double up the controller or swap it out, both?
I am unsure what playing with the pulse widths to this extent does to the noise spectrum and such of the power supply. It is fix frequency, so I doubt
it'll become horribly inefficient provided you're drawing the normal currents through the magnetics (e.g. they won't saturate). The filters will be
tuned to the frequency it's running at, so hopefully they shouldn't be too badly skewed. And, for a lot of chemistry work anyway, noise isn't really
an issue. A bigger problem may be it dropping out of regulation at low voltages / currents. Soltuion? Use a different rail or just a separate linear
supply will do if the power requirement is low. I also don't know precisely how much voltage droop the rails show when they're at full load. But,
based on them being able to reach at least 50V with the PWM all the way up and it unloaded and that the silicon they're usually powering needs a
stable supply at varying (sometimes full) loads, I would expect it's not a whole lot.
I was also thinking, whilst adding a huge linear regulator to the output to adjust the bulk of the voltage or current is defeating the point of using
a SMPS in the first place, we could have one tracking the output, dropping only it's own voltage drop to stay in regulation. That would not be to
adjust the output, but it could be useful if the output is a mess, to clean up the noise and make it even more useful for electronics work. As a
tracking linear stage on the output would only need enough voltage drop to keep it's self in regulation, it shouldn't require huge heat sinks.
If you wanted to get brutal on it, the super regulator.
This is why I was interested in what you'd got up to with them. As there is now a lot of stuff packed into there that could supply a number of the
futures in the high end rack mount things.
There's a question of when modifying something becomes more complex or expensive than starting from scratch. But I don't think many of the things I've
mentioned would be comparable to building such a compact SMPS from scratch. Things like altering the rail voltage essentially involve finding the
correct point and dropping a pot across them. Unlike finding specific magnetics and tuning a SMPS.
If the rails from multiple supplies could all be stacked up to the limit of a normal house socket, that'd be a serious bit of kit! A comparable Lambda
Genesys has got to be a few thousand dollars.
Beginning to wish I had my 123 to hand now.
The target

The starting point

This could really use an injection of Tim "MegaWattZ" 12AX7, as he's built a 10kW induction heater, from scratch, he's probably the most well
versed in the black art round these parts.
[Edited on 28-2-2011 by peach]
|
|
|
Arthur Dent
National Hazard
Posts: 553
Registered: 22-10-2010
Member Is Offline
Mood: entropic
|
|
Cool, excellent primer on a home-built PS, Woelen! I have a bunch of old power supplies in the shed and I know my next weekend is booked making one of
those according to your thoughtful instructions.
I know that there are fewer and fewer of those available, but back in the the days of 386, 486 and early Pentium1 processors, the standard AT (not
ATX) power supplies were wonderful to work with (the ones with the two flat P5/P6 connectors and the hardwired 110v pushbutton power switch).
They had less protection circuitry and many of them could be operated with little or no load. I just added a plain 12v light bulb connected on the 12v
bus , which acted as a minimal load and a power-on pilot light and that was it. I still use this supply often, I built it over 20 years ago! However,
I don't want to use it for electrolysis, so I'll make a new one just for that purpose.
So if you see people throwing away those old obsolete computers, grab' em! they're chock full of neat goodies, from powerful fans, to gold-plated
processors to useful screws and hardware.
Usually, when I throw away a computer, it's a cannibalized empty shell with not much else than the case and the stripped-off boards!
Robert
--- Art is making something out of nothing and selling it. - Frank Zappa ---
|
|
|
woelen
Super Administrator
Posts: 7976
Registered: 20-8-2005
Location: Netherlands
Member Is Offline
Mood: interested
|
|
@peach: These links are quite interesting and it may be interesting to use that info to make a variable output power supply, but I do not have a good
feeling for using this to increase the output voltage very much above 12 V. I assume that many power supply manufacturers use capacitors, which are
rated somewhat above 12 V, but not with much headroom (more headroom means bigger and more expensive capacitors). You write about exploding caps at 50
V, but I'm quite sure that in many cases the caps will be destroyed (slowly) well below 50 V. But the idea remains interesting. It can also be used to
downscale voltages and make a supply with a voltage output from let's say 4V to 12V continuous. Now another resistor needs to be shunted with a
potmeter in order to increase feedback and accordingly reduce output voltage.
For electrolysis purposes this mod would even be more interesting than increasing the output voltage of the power supply. Most interesting range for
electrolysis is between 4 and 7 volts.
If I have an old powersupply again, then this certainly will be something I'll try. It does not look too difficult.
|
|
|
peach
Bon Vivant
Posts: 1428
Registered: 14-11-2008
Member Is Offline
Mood: No Mood
|
|
Yep.
The output capacitors are not going to do well running them at high voltages. Picking any random supply out and just turning the rails up, I expect
quite a few people would report blown capacitors.
I can count 19 electro caps on the board in front of me. Two of these are large 200V caps, which I suspect are the mains side. There are a number of
small ones dotted around between the two heatsinks and near the two IC's. These are rated at 50V and are likely to do with the controller and
switching side. At the right of the board is another large cluster. The majority of these are rated at 10 or 16V, and they'll be the filters for the
output, which will be exposed to the higher rail voltages. Electro caps are usually derated by 1/3 to prolong their life and avoid bursting them with
over voltages. So, with this example, there is basically no room for going over the limit without replacing those with higher voltage values.
Producing high voltages, such as 50V, from the supplies was not primarily of major interest. As the output of these is floating, I suppose multiple
supplies could be carefully stacked to increase the voltage. And the winding on the transformers appears to be one continuous deal, with taps for each
rail voltage.
In terms of electrochemistry, the lower voltage rails (like +5) would be a much easier place to start given that they're closer to the value the
supply is supposed to run at (reducing the chance that it'll drop out of regulation as you turn it down) and they're usually rated for a higher
current, which is what you'd be after for electrolysis, plating and so on.
Does anyone have experience stacking the outputs from more than one supply? Here are some photos and my quick guesses at the SMPS for those nerds into
their electronics and curious about the potential.
This is a supply from 2003


The mains is through the black and white wires under my thumb. They immediately hit a fuse and, something lacking in my 30 amp industrial supplies, an
NTC, to limit the surge when it's switched on. Nice.
In the bottom right there is a small blue cap rated at 2kV, which will be a line filter, and the AC then goes to the bank of four diodes just to the
left of it. The two big caps I am guessing are also to do with smoothing the rectified DC. They must be in series with each other right? Because
they're rated at 200WV, and my initial guess is they're in parallel with a bridge rectifier, which is being fed 240Vac, which will give more than that
in DC. Alternatively, the rectifier is a half bridge.
The tiny resistor to the right of the first big cap may be a bleed. The tiny ceramic beside it may also be for diode noise or bypassing. There is
another, considerably larger, ceramic just behind the two big electros to the left. Probably also part of the line filter.

This is where things start getting really impressive if you're a nerd. The three black bits of silicon on the heatsink to the left are the switching
transistors, which begin chopping the DC up at high speed and feeding it through.
The big transformer at the back is almost certainly the power transformer with the secondary taps that feed each of the rails at the end of
everything.
The two smaller transformers I'm thinking are the isolation / feedbacks for the controller.
I'm not entirely sure what the thick wire, few winds inductor is (without consulting the schematic). It could be to filter noise, pulse shaping or to
help stability in some way. As there's no other winding on it, it won't be for feedback.
All of the caps and diodes in this stage are likely related to feedback and switching.
That power transformer is actually rather small indeed given what is flowing through it. The beauty of switch mode.

The area at the bottom right, surrounded by resistors and tiny green caps is the controller it's self.
Only two IC's, with the one on the left being the KA7500B mentioned in the page I linked to (the switch mode controller from fairchild). The one on
the left is the comparator.
This is the datasheet for the KA7500B controller. In this photo, it's upside down. The two pins needed to squiffy the rail voltages are the second
from the right on the top and the third from the left on the bottom.
If I could find a roughly 10k pot, I'd be tempted to try it with this busted up board, since one of the rails will still be functioning.

The output section.
The AC from the mains has now been rectified to DC pulses, smoothed by the input capacitors, chopped up into variable width high frequency pulses by
the first transistors and controller, fed through a step down transformer as AC at a new frequency and arrives..... here.
The second heatsink, on the left, is lined with rectifiers to convert it back to DC. The toroidal inductors form an LC filter, which is tuned to the
frequency of the chopping to make it as small as possible. The remaining capacitors are effectively the voltage limit of the rails, as they're very
close to the normal rail voltages in this example and would vent (pop / explode / release the magic purple smoke), through those crosses on their tops
if they were driven into an over voltage state. There are quite a few of them, one for each rail.

[Edited on 28-2-2011 by peach]
|
|
|
smaerd
International Hazard
Posts: 1262
Registered: 23-1-2010
Member Is Offline
Mood: hmm...
|
|
That's a shame what you say about these dell PSU's not working? I read a comment in an instructables page saying someone got one to work(model not
specified) even without using a 10ohm 10watt resister. I think I'm going to try to omit the 10ohm 10watt resister as well and see how things fly. If
this is a terrible idea let me know in advance please.
Instead of working inside of the metal chasis I decided to scrap an old poly-carbonate project box and drill some holes in it for the bindings. The
PSU's chasis is too small and I really really want to avoid having anything too cramped even if the project loses it's sex appeal.
So far all I've done is solder the grey wire -> 330ohm 1/4volt resister -> another wire -> LED cathode. then soldered LED anode -> to a
black wire. Shrink tubed all the soldering points and mounted to the project box.
I'm debating on clipping some of the black wires I have a large abundance of them and it will only be a mess to solder. I might keep 3-4 of them? I am
also planning on clipping all of the orange 3.3-3.5 volt wires, as I figure a 12 volt and a 5 volt are more than enough for what I need. I'm also
planning on clipping the one lonely blue wire as well.
The one thing I'm a little troubled by is am I supposed too solder all the yellows to the end prong of the binding? That's going to be a b*&^% but
good practice I'm sure.
The one thing I'm confused by is fuses. If I wanted to place fuses in for added safety where would I put them and what kind should I get?
This thing won't be plugged in until I order a power-cord for it(it came cord-less). So if you strongly feel that this dell psu idea won't work no
matter what is done(in the hands of a noob) let me know.
|
|
|
woelen
Super Administrator
Posts: 7976
Registered: 20-8-2005
Location: Netherlands
Member Is Offline
Mood: interested
|
|
You certainly could give it a try, but it is well-known that many of the branded supplies and mainboards have special control logic for tighter
integration. This may make independent operation of such parts more difficult or even impossible. But of course, things vary from one type of computer
to another type of computer, so I do not say beforehand that your attempts will fail. But I would not spend quite some money on this project before I
had the power cord and could test things. It would be a pity if you put a lot of effort and money in this only to find out that it does not work.
For this reason I only use no-name power supplies (the well-known little boxes, as shown in the picture on my webpage and in peach' picture of the
pile of waste in this thread).
|
|
|
Regolith
Hazard to Self
Posts: 73
Registered: 4-2-2011
Location: Mining the moon.
Member Is Offline
Mood: Glacial
|
|
@peach, your version of fun....
"just before the output caps explode and blow hot goo towards you That's exciting!"
edited for humour sake
Smaerd your likely going to be just fine, Look at his picture guys, 20 pin atx model not 24. Your supply looks like the older type that lacks the
board level integration. Have a ghost draw on the line as it sounds like you already do.
Peach thats the type of modding I was referring too, I DO like someone else blazing the trail ahead of me, as looking up the regulators and tracing
board trace gets old quite fast. Of course you'd find a page on building your own op amp.... There are just some things I didn't
expect humanity to be doing on its own, like one man vacuum tube making.
They already have kilowatt and up models that almost blow a standard breaker. To be sure if the output rails were wired together and the lower voltage
parts replaced with same functioning high voltage couterparts a hundred dollar model could take the place of a thousand dollar piece of kit.
That just doesnt seem to make sense an antec 1000W power supply could with some minor tinkering take the place of something much more expensive ?
Markup I suppose plus digital readouts right on the front (sacrifice a cheap multimeter for its guts, could even wire the amperage detection in as
well and switch between them). Also the voltage on Peachs baby goes to 600 volts and a possible 400A output, okay you won't get that without work. But
the full amperage upto say 100 (50 would be very respectable, thats the max of my variable) volts (or overload of input) should be attainable.
Edited for forgetting. The newer supplies also often have no cables from the supply box, they come with a bag of cables and they connect in modular
fashion to the supply.
That just screams mod me, The cables themselves could be modified for various uses and have them modular to the type of task your doing, a set with
banana plugs, one with alligator clips etc.
[Edited on 1-3-2011 by Regolith]
|
|
|
smaerd
International Hazard
Posts: 1262
Registered: 23-1-2010
Member Is Offline
Mood: hmm...
|
|
@woelen - Thanks for the advice again. So far I've invested $7 and a cord should cost $1.99 + shipping. So we'll see. If it doesn't work the idea
behind the design was actually based on this hehe. If it doesn't work I can still get a different power supply cut the cables and resolder them to the
cables already wired in the external box.
@regolith, thanks for the clarification on that . Soon as I get the power cord
and can borrow my friends voltmeter I'll update this thread. Soldering to those binding posts seriously sucked as far as soldering goes but it all
worked out .
|
|
|
smaerd
International Hazard
Posts: 1262
Registered: 23-1-2010
Member Is Offline
Mood: hmm...
|
|
Borrowed the cord from my parents computer. I plugged it in and there was nothing happening when I flicked the switch. My heart sank. Then I realized
it was on 230 and not 115. Plugged in and flicked on the SPST switch the LED came on, the fan on the PSU spun. Good news!
tested a red LED(no resister) on the 5v and ground. Light came on.
tested the LED on the 12v and the light came on and quickly blew out hahaha.
So I'm assuming it's up to standard. I'm going to try to take it into school and see if they have a volt meter there I can test this sucker with. I
didn't use the 10ohm 10watt resister or fuses. Just rigged it up as is.
[Edited on 4-3-2011 by smaerd]
|
|
|
peach
Bon Vivant
Posts: 1428
Registered: 14-11-2008
Member Is Offline
Mood: No Mood
|
|
Don't plug it in without asking first. The staff are quite likely going to go mental if they find you've plugged in DIY mains powered electronics in
secondary school.
We weren't allowed to run anything we'd made directly off the mains even in university, in an electronics lab.
|
|
|
Regolith
Hazard to Self
Posts: 73
Registered: 4-2-2011
Location: Mining the moon.
Member Is Offline
Mood: Glacial
|
|
Hah! in my day here in shop class we made electric pencils (googled "electric arc etching pens") that were just tiny tattoo style arc welders. Made
our teachers proud and they let us engrave pretty much everything (every piece of metal we owned, desks etc) in sight of a wall plug.
Yeah these days I can see the bomb squad getting called and people freaking out. Especially if it makes any magic purple smoke... That would be very
bad. It sounds however like it's pretty stock still ? No modifications to the power sections, as in it's still wired for its factory voltages and
regulators ?
Who knows, maybe someone there will get a kick out of this idea as well.
Smaerd, you should really get a super cheapo meter. You can get nice little digital guys for like 14 bucks these days(volts, amps, cont. etc with type
K thermocouple). Not everyone needs a fluke scopemeter.
|
|
|
Arthur Dent
National Hazard
Posts: 553
Registered: 22-10-2010
Member Is Offline
Mood: entropic
|
|
@ Woelen: I have this nice old IBM power supply (from an antique PS/2 P1) that i have started disassembling.
Since I am going to use this project for more than electrochemistry, I decided to add additional banana plugs for the 3.3v and the 5v buses. I'll use
the 5v bus because it can deliver a whopping 18 amps, as compared to the 12v bus that can only muster 4.2 A.
So Instead of a 10 ohm load on the 5v rail, would it work if I were to drop a behemoth 22 ohm, 30w wirewound ceramic tube resistor on the 12v rail?
...in the hopes that it's going to be a big enough load to keep the supply continuous and it won't warm up too much. 22 ohms on 12V consumes a bit
over half an amp, so that would only be a bit less than 7 watts going through the resistor... that shouldn't warm up the case too much!
So the brown wire must be connected to the orange? No need to put any load on that bus, right? According to the specs, the 3.3V line can deliver 10
Amps so that's another powerful source...
Thanks!
Robert
--- Art is making something out of nothing and selling it. - Frank Zappa ---
|
|
|
| Pages:
1
2 |


