| Pages:
1
2
3 |
PirateDocBrown
National Hazard

Posts: 570
Registered: 27-11-2016
Location: Minnesota
Member Is Offline
Mood: No Mood
|
|
I'd suggest another source for brass stock, spent cartridge cases from a firing range. Many times, they can be had for free, if you do the labor of
collecting them.
Most typically, they are 70 Cu, 30 Zn.
Phlogiston manufacturer/supplier.
For all your phlogiston needs.
|
|
|
Fulmen
International Hazard
Posts: 1693
Registered: 24-9-2005
Member Is Offline
Mood: Bored
|
|
True, but looking at the phase diagram I can't see any signs of that for these alloys. The beta phase isn't present until you go above 30% Zn.
We're not banging rocks together here. We know how to put a man back together.
|
|
|
elementcollector1
International Hazard
Posts: 2684
Registered: 28-12-2011
Location: The Known Universe
Member Is Offline
Mood: Molten
|
|
We've since moved on to aluminum bronze, so the Cu/Zn phase diagram isn't exactly helpful anymore. Here's the Cu/Al phase diagram:
The typical composition of aluminum bronze, at 90% Cu, lies near the edge of the wedge-shaped beta phase near the far right. However, it looks like
there are quite a few phase changes during cooling to room temperature, the most interesting of which looks to be a mixture of beta and solid solution
of Cu, as well as an alpha-2 phase near the bottom at around 300-400 degrees Celsius. So, if I had to take a wild guess on what's going on, it'd be
this:
Quenching right after solidification locks the structure in the beta phase, or possibly a mix of beta and solid-solution copper. This might be
responsible for the color - hard to say.
Cooling to room temperature more slowly, however, gives time enough for grains of alpha-2 to form (I'm extremely rusty on my metallurgical phase
crystal growth lessons, so I'm not really sure what's going on beyond this). This would presumably affect the paler color I've seen in my attempts.
Elements Collected:52/87
Latest Acquired: Cl
Next in Line: Nd
|
|
|
MrHomeScientist
International Hazard
Posts: 1806
Registered: 24-10-2010
Location: Flerovium
Member Is Offline
Mood: No Mood
|
|
Glad to see more discussion on this! I haven't done any metalcasting in a long time, because it's so ungodly hot outside here.
EC1, those do look a bit coppery to me. Still beautiful metal, though! I know all about how hard it is to get accurate pictures of
the colors. I have no idea where the weight loss came from; that's surprising. Copper alloys usually use charcoal dust as a cover, to help prevent
oxidation. I tried it once but didn't notice much. I may not have used enough. I suspect purity of starting metals affects color a great deal. My
initial pours from the bronze look great, but seem to get progressively more tarnished-looking as I remelt and repour the same metal. I tried using
copper and aluminum electrical wire for highest purity.
Sulaiman, thanks for the support! RE: your anecdote, the reason brass alloys are so troublesome is the fact that the zinc vaporizes
so easily. I saw that in my initial experiments, when the zinc caught fire every time I added a piece. Even melting scrap brass is difficult, because
it's constantly losing zinc while molten. That's why it's almost impossible to know the exact composition, even for the experts! So for brass you
generally want to melt and pour as fast as possible. I imagine you could limit this with inert atmosphere or a lot of cover flux.
|
|
|
elementcollector1
International Hazard
Posts: 2684
Registered: 28-12-2011
Location: The Known Universe
Member Is Offline
Mood: Molten
|
|
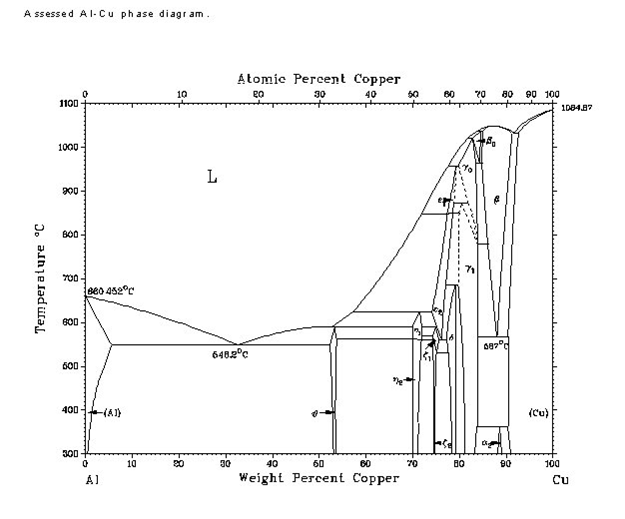
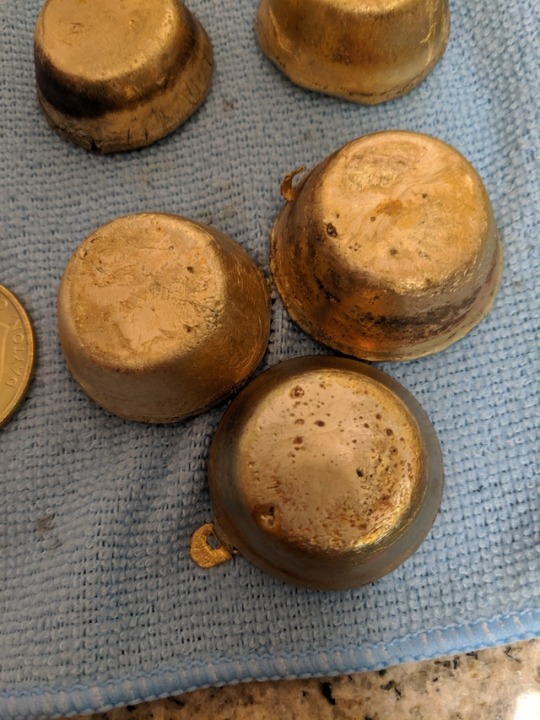
Latest attempt on the bottom right - pure aluminum hobby wire and the usual copper scrap. Took a different approach this time - waited for the furnace
to get completely up to temp, put copper in with a little borax, stirred after it melted (no dross!), and dropped and stirred the aluminum in. I also
noticed it heat up when the aluminum was added - definitely an exothermic reaction happening there!
I did quench this in water this time, but it doesn't seem to have affected the color much...
Not much difference in the color (it maybe looks a shade yellower in person than the rest), still too pale for my liking.
This could mean two things: One, that the change in purity of the aluminum doesn't have any effect on the overall color (this would be confirmed by
repeating with copper electrical wire). Or two, that the crafting wire wasn't actually pure (unlikely, as it has to be more flexible for crafting
purposes). This might also indicate that an impurity in the copper is the actual problem.
Density results pending, but I'm expecting it to be something close to 90.3% copper. I'm also going to try making 95/5 with my current stock to see
how that impacts things.
I'm tempted to wonder if I'm just being picky at this point - it's always going to look pale under certain lighting, and I could spend years getting
closer and closer to that 'real' gold look.
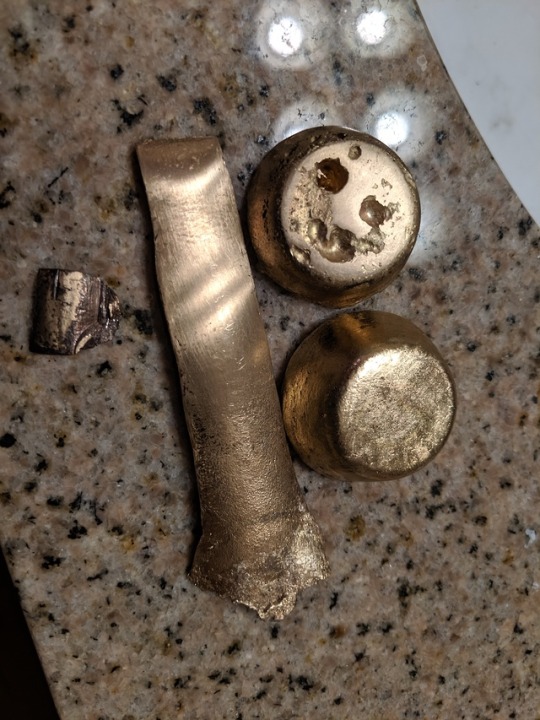
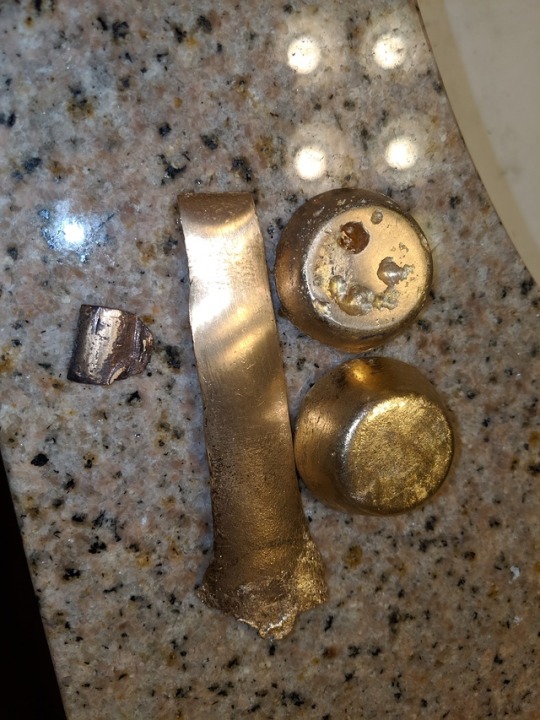
EDIT: I think I might actually just be being picky - rewatching MrHomeScientist's video comparison, I note that the difference between the 'impure'
run that quenched to a richer color and the one that used more pure copper and aluminum looks very similar to the difference I can spot between my two
samples. I'm still going to try the tests outlined above, but it's entirely possible it's just the lighting that's throwing me off... Here's some more
pictures with better lighting contrast (and a brass coin for comparison):
EDIT: Density results are in! This one is about 92.43% copper assuming no other contaminants - this is up quite a bit from the starting concentration
of 90.47%. This would indicate that I'm losing more aluminum to evaporation or burning than copper proportionally.
[Edited on 10/11/2019 by elementcollector1]
Elements Collected:52/87
Latest Acquired: Cl
Next in Line: Nd
|
|
|
Junk_Enginerd
Hazard to Others
Posts: 250
Registered: 26-5-2019
Location: Sweden
Member Is Offline
|
|
I started reading this thread just now, and was about to recommend that you attempt aluminum bronze to alleviate the vaporization issues...
I've done a lot of experimenting with copper alloys myself, and I've made both brasses and bronzes.
My experience is that, relative to each other, aluminum bronze is silvery, brass is very yellow, tin bronze goes more toward red and lead will
predictably make it darker and duller.
If you think the aluminum bronze isn't yellow enough, perhaps combining both zinc and aluminum might get you there?
As for minimizing losses, a lid on the crucible always helps. Coal will absorb any oxygen, and borax will act as both a physical liquid barrier on top
of the melt as well as a flux by combining with slag.
Personally I never use any flux and it works out fine anyway.
|
|
|
MrHomeScientist
International Hazard
Posts: 1806
Registered: 24-10-2010
Location: Flerovium
Member Is Offline
Mood: No Mood
|
|
elementcollector1 sent me some of his bronze samples for color comparison to mine, and here are the results.
The top two photos are under lab fluorescent lights, and the bottom two are under kitchen LED lighting. The pictures on the left are the "as-cast"
surfaces, just as they are after pouring. In the right pictures, I sanded the bottom of each ingot with 220 and then 440 grit sandpaper to give the
'true' color.
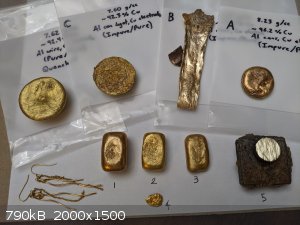 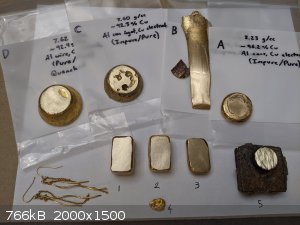 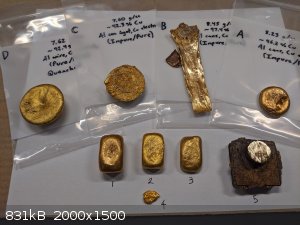 
A-D were the samples EC1 sent, and 1-5 are my own:
Sample 1 & 2: Cast ingots made from soda can Al and Cu wire.
Sample 3: The sample I made on the previous page of this thread, using Al wire and Cu wire (so, very pure).
Sample 4: Actual gold nugget.
Sample 5: A leftover piece from casting, which was sawn off to expose fresh metal but not sanded.
There's also a pair of gold-plated earrings, to compare against shiny gold as opposed to the rough nugget. I don't know what karat they are, though.
It's extremely difficult to see the real color of these things with just pictures, but I hope that gives you some interesting data.
One of my observations, which your samples seem to support, is that the as-cast surface is more more golden than the 'true' color. Being mostly
copper, this alloy will tarnish and it must develop a bit of oxide coating when cooling after casting.
However, I have seen some fantastic pieces online that look perfectly golden after sanding and polishing. One more avenue I want to explore is
incorporating silicon to the alloy. I heard this improves the color even more. An easy way to do this would be to use cast aluminum instead of soda
can aluminum: casting Al has something like 12% silicon to help prevent shrinkage, so that would contribute a couple percent of Si to the final
bronze. Cast aluminum is found in aluminum objects that were cast, as opposed to extruded (like cans). Wheel rims for cars are very popular in the
casting community, although good luck breaking them down into usable-size pieces. I have some yard spotlight housings that appear to be cast Al that I
need to melt down. I also really want to try 'conditioning' soda can Al by adding powdered Si and seeing if that will dissolve and alloy properly. So
much stuff I want to do, but I just can't seem to find the motivation these days. :/
[Edited on 11-4-2019 by MrHomeScientist]
|
|
|
elementcollector1
International Hazard
Posts: 2684
Registered: 28-12-2011
Location: The Known Universe
Member Is Offline
Mood: Molten
|
|
Nice photography work! Your camera is way better than mine. I'm pleased to see I was able to get very close to your sample #2 with ingot D - and it's
also great to have a confirmation about the paleness of the color when polished.
Silicon affects the color? I'm interested to try this. If I remember right, only a very small amount of silicon actually dissolves in aluminum or
copper, so it might be worthwhile to simply toss a chunk in during melt and wait for it to saturate the molten mix over time - it should float on the
mix and not melt. Maybe even a silicon powder, with stirring, to act as both a flux and a part of the alloy?
Elements Collected:52/87
Latest Acquired: Cl
Next in Line: Nd
|
|
|
elementcollector1
International Hazard
Posts: 2684
Registered: 28-12-2011
Location: The Known Universe
Member Is Offline
Mood: Molten
|
|
Just got some (presumably) A356 aluminum alloy wheel parts from a local junkyard. Should be about 7% Si, and like you said, they're fairly large
pieces (and, in fact, the only actual pieces I could find - the rest were whole wheels). Going to try and section them and then melt into a 90/10
composition tomorrow (or 90/9.3/0.7, I suppose), using the same copper source. I'm pretty curious to see how these will turn out - I'm expecting them
to be a fair bit darker than the stuff I've been making.
Elements Collected:52/87
Latest Acquired: Cl
Next in Line: Nd
|
|
|
MrHomeScientist
International Hazard
Posts: 1806
Registered: 24-10-2010
Location: Flerovium
Member Is Offline
Mood: No Mood
|
|
Awesome! I'm eager to see the results.
|
|
|
elementcollector1
International Hazard
Posts: 2684
Registered: 28-12-2011
Location: The Known Universe
Member Is Offline
Mood: Molten
|
|
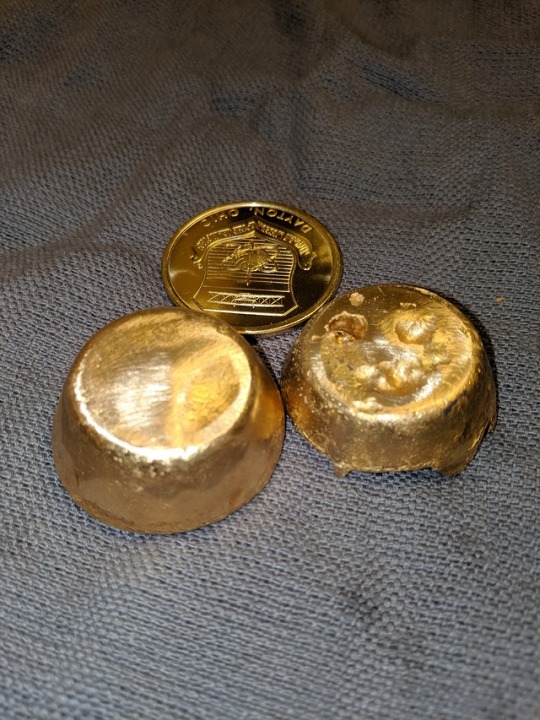
And here they are!
The 90/10 A356 ingot is on the bottom, and the two on the top are 95/5 pure Cu/Al ingots. What's interesting is that the color is pretty comparable in
this lighting - that Si has clearly made some sort of difference. However, it becomes more apparent in person that while the polished form is roughly
the same as that of the 95/5 ingots (i.e. still a touch too pale), the unpolished form is actually visibly a darker yellow. Next trial will be 95/5
Cu/A356, and I might also do one with a manual addition of some pure Si I got from a rock shop to check if removing the other impurities in A356
improves the color further.
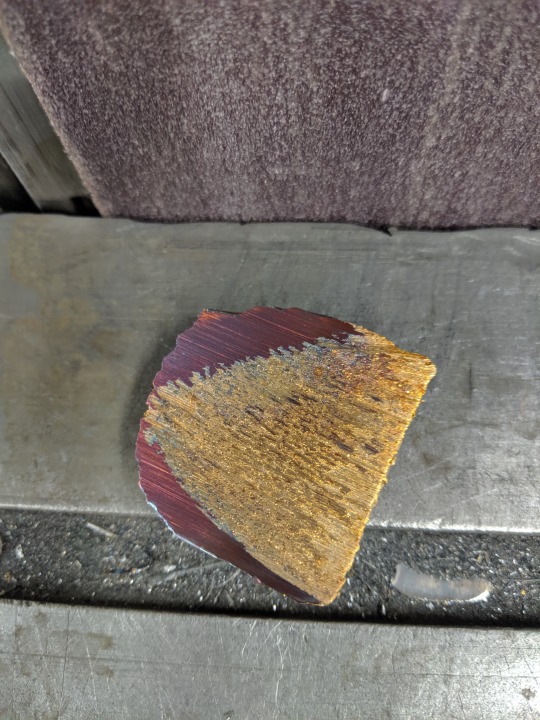
One last interesting thing I found is that when this alloy cooled from molten, it formed a bright purple temper on the surface, which was a little
hard to capture on photo:
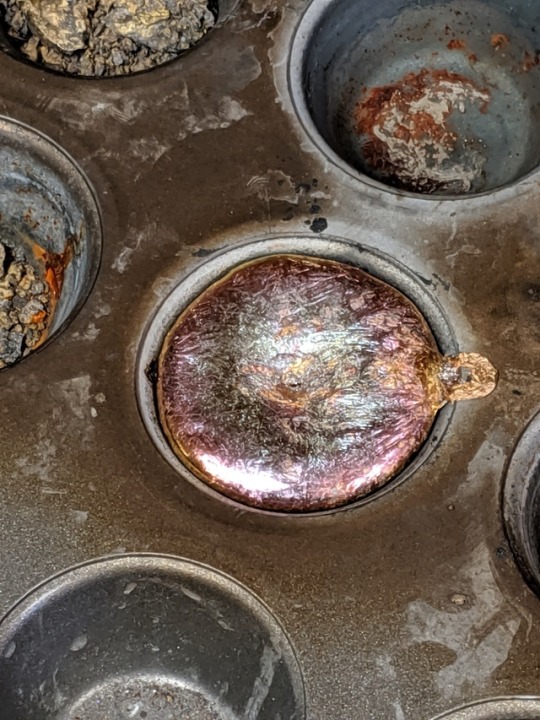
This removed itself when quenched all the way down to room temperature with water, but it was still fascinating to briefly see a bright purple metal!
Elements Collected:52/87
Latest Acquired: Cl
Next in Line: Nd
|
|
|
MrHomeScientist
International Hazard
Posts: 1806
Registered: 24-10-2010
Location: Flerovium
Member Is Offline
Mood: No Mood
|
|
Very cool! The purple color is really interesting. It sounds like the "true" color you see in the polished metal didn't change much, though. It's
curious that it affects the oxide coating more.
Here's a video of a silicon bronze cast: https://www.youtube.com/watch?v=yW4TgZoUsK8&feature=yout...
Wonderful video that covers the entire casting process from start to finish. I definitely recommend watching the whole thing if you're looking at
getting into sand casting at all. But skip to 27:50 to see the finished product. The polished edges on his coin look phenomenal! According to the
video description, his alloy is "6.5% aluminium 2.5% silicon pinch iron and Manganese balance copper." An interesting deviation from the "standard"
10% Al most people seem to use; it looks like his is around 10% total alloying elements.
Edit: It looks like C64200 is a common commercial Al-Si bronze alloy, with 7% Al and 1.8% Si. I might try and get a sample of it from
someone.
[Edited on 11-13-2019 by MrHomeScientist]
Edit Edit: Another option would be to buy silicon bronze and add Al to that. Belmont Metals has "Silicon Bronze Everdur" that is 95% Cu, 4% Si, and 1% Mn. If my math is right, starting with 100g of Everdur you'd need to
mix:
100g Everdur
49.6g Cu wire
10.4g Al wire
to get to the video's ratios. This yields:
160g total weight
93.5% Cu
6.5% Al
2.5% Si
0.6% Mn
Belmont, unfortunately, has a rather steep minimum order threshold, but we can use this as an example.
[Edited on 11-13-2019 by MrHomeScientist]
|
|
|
elementcollector1
International Hazard
Posts: 2684
Registered: 28-12-2011
Location: The Known Universe
Member Is Offline
Mood: Molten
|
|
Switched over to brass for a bit. I was curious to see if I could make an ingot without lighting the zinc on fire, by starting with molten zinc and
adding copper. Turns out the answer is a resounding 'sort of'.
Heating to about 500 allowed me to melt all of the zinc (purity 99.2%, from roofing strip) easily. Adding in an excess of copper until everything
solidified also proved easy, and the solidified chunk turned vaguely gold-ish (at least, compared to the molten zinc). Turning up to 700 presented
little problem, although the zinc did start to smoke and form zinc oxide in the air. More copper was added and the mixture was allowed to sit and
dissolve. It didn't solidify this time, but I ended up turning it up to 900 C to get things going. Unfortunately, this was where the zinc started
oxidizing in earnest, forming cotton-candy-like puffs of ZnO that stuck to my stir rod and lighting up green whenever I so much as poked the molten
mixture. Adding in copper did nothing to alleviate this effect, and eventually I gave up and poured out some ingots.
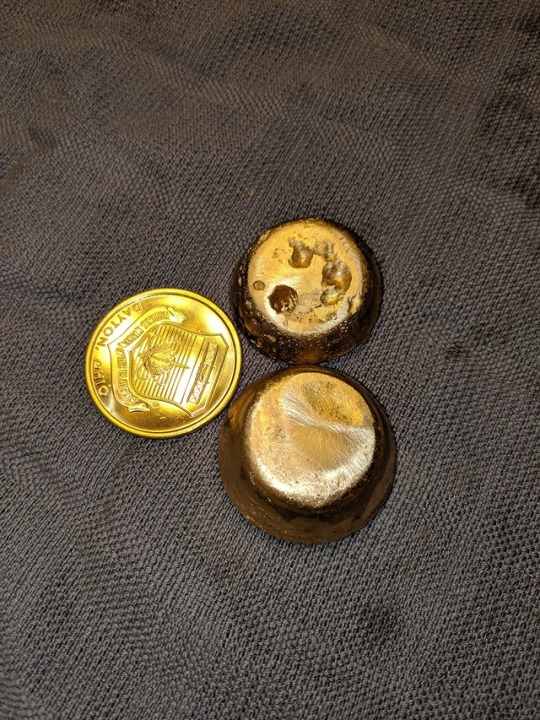
Here's a color comparison between an ingot of brass (left), an ingot of aluminum bronze (right), and pure gold leaf (top):
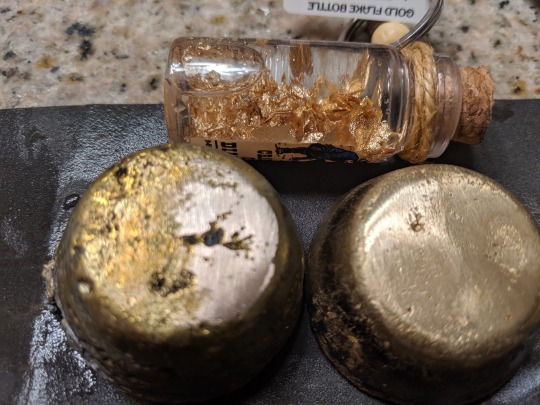
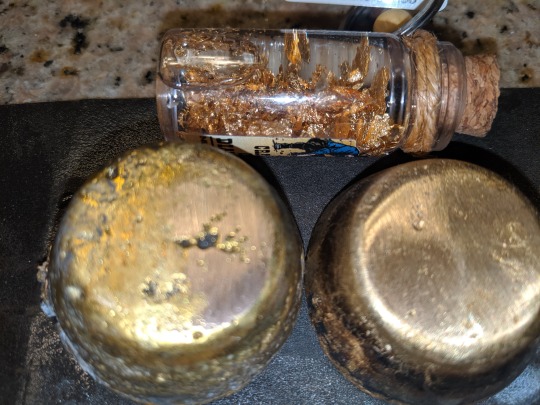
As you can see, they're both too pale when polished. It's difficult to see in this artificial light (being as yellow-orange as it is), but the brass
is actually extremely yellow in as-cast form, far more so than gold itself.
I'm thinking maybe a mixture of the two would allow an as-cast color identical to gold? Polishing would then be alleviated by allowing it to tarnish
back to the appropriate shade and then sealing it with something to prevent further oxidation. I've no idea of the composition of this brass at the
moment - I'll edit this post as soon as I can measure it.
I also noticed another interesting thing when polishing a previous sample of aluminum bronze. Because of the high speeds of the belt sander, the
sample began to temper on the polished surface to a very uniform color, and appeared to have the full range of temper colors, just like steel (which
makes sense, as tempering colors are a thin-film iridescence effect due to a very thin oxide layer that diffuses into the lattice a certain depth at a
certain temperature). Here are bronze, blue-green and violet:

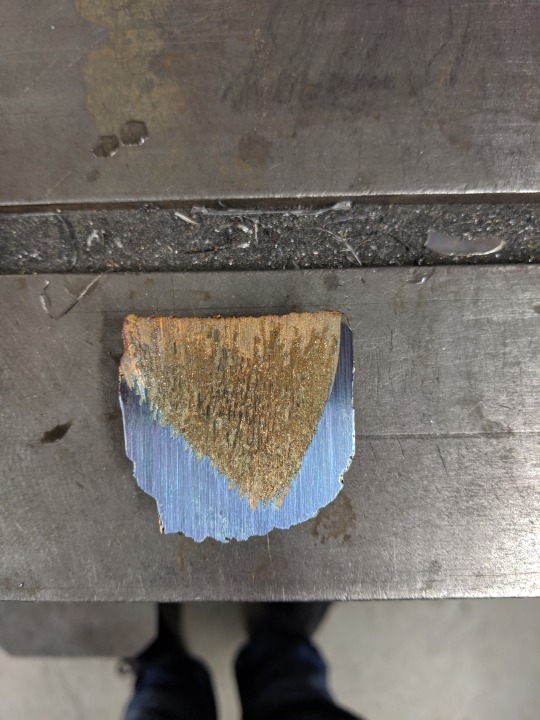
The bronze color is gorgeous, but it's unfortunately too dark for real gold. There does exist a lighter bronze color as the lowest temper coloration,
so I'm thinking specimens could possibly tempered to the proper color if needed?
...I just really want to get this color exactly right.
Elements Collected:52/87
Latest Acquired: Cl
Next in Line: Nd
|
|
|
| Pages:
1
2
3 |


